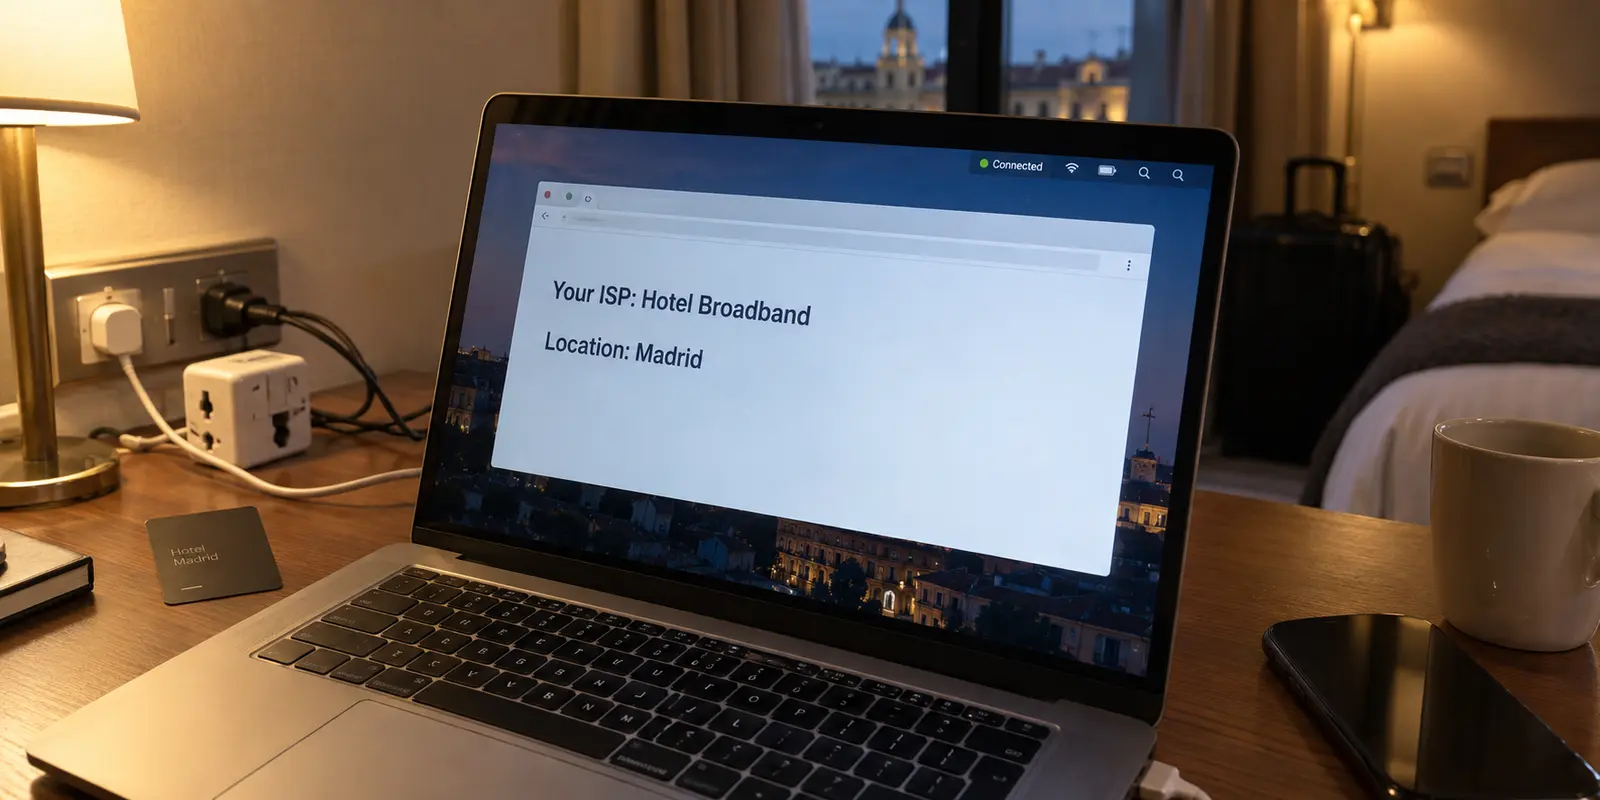
The menu bar icon glows green, the status window reads Connected, and the session timer ticks up second by second. Yet when you load a basic IP lookup site, your local internet provider’s name is splashed across the page. Or perhaps an app still flags your domestic region, a DNS leak test reveals your hotel’s local router, or a web service casually displays your home city.
The gut reaction is almost always the same: assume the VPN server glitched, disconnect, reconnect, switch from London to Zurich, clear browser cookies, or reinstall the app from scratch.
None of those actions make sense until you understand one foundational quirk of macOS networking: a VPN tunnel can be completely healthy while your Mac actively sends specific traffic out the back door.
Apple designs macOS to juggle multiple network pathways simultaneously. Behind that tranquil green status badge, system routing tables, network extensions, proxy rules, and application-specific settings are constantly negotiating which interface gets which packet. The question isn't whether your VPN has connected—it's which traffic actually uses it.
Article summary and product fit
Why can a Mac show a VPN as connected while the IP address, DNS, or apparent location still looks local?
A green VPN status proves that a tunnel exists, not that every packet is using it. Compare IPv4, IPv6, DNS, and a Terminal IP check to find what is bypassing the tunnel, then inspect split-tunnel rules, competing Network Extensions, proxy settings, custom DNS, and managed profiles. If IP and DNS tests are clean but a site still knows your city, check browser location permission, cookies, account state, and Safari’s Private Relay instead of treating it as a VPN leak.
What to keep in mind
- Best for: Mac users who see their ISP address, local DNS resolver, or an unexpected location even though the VPN client reports Connected.
- Key check: Separate general routing failure, partial IPv6/DNS/application bypass, and non-network geolocation before reinstalling anything.
- OnlydogVPN fit: The article positions an automatically routed Mac client as a replacement only when the Mac configuration is clean yet the current VPN repeatedly fails to bind traffic consistently across normal network handoffs.
- Important limit: A website can identify physical location through browser permissions, Wi-Fi-based geolocation, cookies, or account data even when the VPN tunnel itself is working correctly; managed profiles may also be outside the user’s control.
Sources already used in the article include Apple’s Network Extension framework, W3C Geolocation API, and CoreLocation services. Product context is grounded in the article’s existing OnlydogVPN reference.
What “Connected” Actually Proves on a Mac
When your VPN toggles to active, it creates a virtual network interface and establishes an encrypted link to a remote server. But an established link is not an absolute law that binds every single packet leaving your machine.
Under Apple’s Network Extension framework, a VPN provider defines which destinations are sent into the tunnel and which ones are bypassed. A "full-tunnel" configuration tells macOS to route default internet traffic through the virtual adapter. A "split-tunnel" setup intentionally leaves local printers, select business apps, or domestic websites on your physical Wi-Fi or Ethernet connection.
On top of whatever the VPN client requests, macOS applies its own priority logic. If an older security tool, a forgotten proxy script, an aggressive web filter, or a competing DNS profile is active, the operating system may honor those instructions ahead of the VPN.
This dynamic leaves you facing one of three distinct situations:
- General bypass: Virtually all of your ordinary internet traffic is slipping around the VPN, meaning default routing was never handed over to the tunnel.
- Partial bypass: Your general web traffic enters the tunnel, but specific components—such as DNS lookups, IPv6 traffic, a background utility, or a single browser—take an unencrypted detour.
- Non-network identification: Your traffic is flowing securely through the VPN, but the website is identifying your physical location through device sensors, account cookies, or browser permissions completely separate from your IP address.
Toggling between random countries does nothing to solve any of these. You need to identify what is actually slipping through the cracks.
Run Tests That Tell You What Is Escaping
To find the leak, establish a baseline. Disconnect your VPN, run a quick set of diagnostic checks, then reconnect to the VPN and repeat them on the same network. Look for the specific divergence.
| Diagnostic Observation | What It Actually Means | Primary Action | | Public IPv4 & IPv6 remain your ISP’s addresses | Full-tunnel failure; default traffic never entered the virtual interface. | Check competing macOS Network Extensions and VPN configuration. | | IPv4 shows VPN address, but IPv6 shows real ISP | IPv6 leak; the VPN fails to route or block IPv6 traffic on dual-stack networks. | Disable IPv6 locally or configure the VPN to route/block IPv6. | | Browser shows VPN IP, but desktop app/terminal does not | Application-scoped routing, browser proxy extension, or split tunneling. | Inspect VPN bypass rules and browser extensions. | | Public IP changes, but DNS tests show hotel/ISP resolver | DNS leak; domain lookups bypass the encrypted tunnel. | Clear custom macOS DNS entries; check VPN DNS settings. | | IP and DNS point to VPN, but site still knows your city | Device-level geolocation or browser permissions, not a network leak. | Revoke browser location permissions; clear site cookies and cache. |
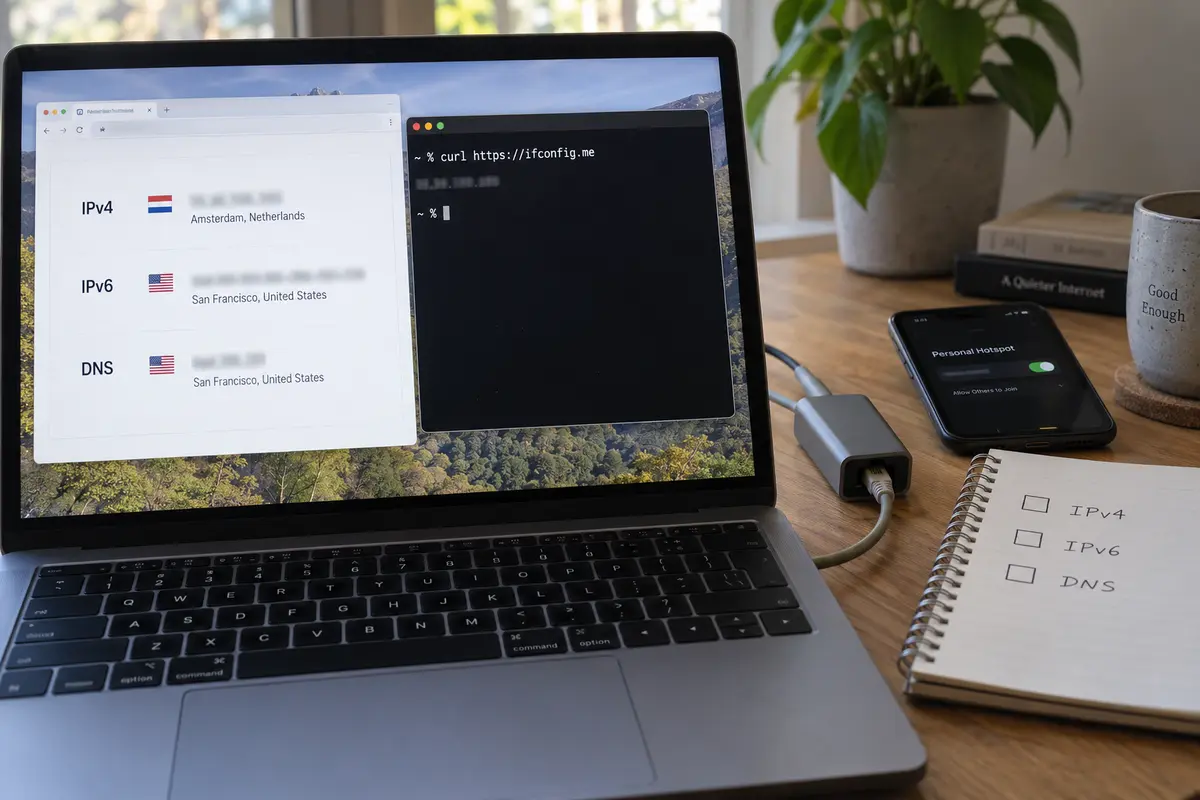
When checking your IP address, ensure your test displays both IPv4 and IPv6. macOS handles routing for IPv4 and IPv6 as separate rule sets. If your home broadband or mobile hotspot assigns you an IPv6 address and your VPN only handles IPv4, your IPv6 requests will quietly bypass the tunnel entirely.
Next, look at the DNS resolvers handling your domain queries. When you type a web address, your Mac must ask a DNS server to translate that name into an IP. If your browser shows an IP address in Amsterdam, but your DNS test returns the hostname of your local broadband provider down the street, your browsing destination is visible to anyone monitoring your local network.
For readers comfortable with a single command, you can confirm whether the Mac’s underlying shell matches your browser by opening Terminal and pasting:
curl https://ifconfig.me
If Terminal outputs your real residential IP while your browser displays the VPN’s server address, your Mac is running a proxy or application-specific rule rather than a whole-device VPN tunnel.
Remove the Competing Route Instead of Reinstalling
Once you know what is escaping, stop reinstalling your VPN client. Reinstalling simply reloads the same software into the exact same conflicting macOS environment. Instead, methodically check the specific Mac settings capable of hijacking your traffic.
1. Audit the VPN’s Own Exclusions
Start inside the VPN client’s settings menu. Look for features labeled Split Tunneling, Bypass, or Local Network Access. If split tunneling is set to exclude certain apps, or if local network sharing is aggressively defined, legitimate web traffic can accidentally fall into the bypass bucket. Disable split tunneling temporarily to see if full coverage returns.
2. Check for Competing Network Extensions
Over years of use, Macs accumulate remnants of past software. A trial antivirus tool you deleted months ago, an old corporate endpoint agent, or a secondary privacy tool may still have an active background filter running.
Navigate to System Settings → General → Login Items & Extensions, then scroll down to Network Extensions. Inspect the list. If you see filters, content blockers, or legacy VPN configurations from software you no longer actively use, toggle them off. Multiple network extensions competing to inspect the same packet queue is one of the most common causes of erratic Mac routing.
3. Inspect Wi-Fi and Ethernet Proxy Settings
A stale proxy configuration will silently override a VPN’s default gateway. Go to System Settings → Network, select your active connection (Wi-Fi or Ethernet), click Details, and select the Proxies tab. Unless your employer or school explicitly provided a proxy auto-config (PAC) file, every toggle here—Web Proxy (HTTP), Secure Web Proxy (HTTPS), SOCKS Proxy—should be switched off.
4. Check Custom DNS Entries
In that same network Details window, look at the DNS tab. If you previously entered static IP addresses for Google DNS (8.8.8.8) or Cloudflare (1.1.1.1), macOS may prioritize querying those addresses over your physical Wi-Fi interface instead of adopting the internal DNS server pushed by your VPN tunnel. Remove manual IP entries so the field falls back to automatic assignment.
5. Identify Managed Profiles
If your MacBook was issued by an employer, university, or school, open System Settings → Privacy & Security → Profiles (or Device Management). Organizations routinely enforce custom routing rules, mandatory proxies, or split tunnels via Mobile Device Management (MDM). If a managed profile dictates how network traffic leaves the machine, you cannot override it from a personal VPN client.
Work through these checkpoints one at a time. Change a single setting, reconnect the VPN, and run your baseline test again. Changing everything at once leaves you with no idea what actually cleared the path.
When the Route Is Clean, Stop Blaming the VPN
There is an infuriating scenario every Mac user eventually encounters: your IPv4 points to your VPN, IPv6 is secure, your DNS resolves entirely to an anonymous data center, and yet a shopping portal or mapping service still pinpoints your exact neighborhood.
This is not a leak. Your VPN is doing its job; the website is simply finding you through a different doorway.
Websites do not rely exclusively on IP addresses to establish where you are. Modern browsers support the W3C Geolocation API. When you visit a site, your browser may prompt you: "example.com wants to know your location." If you click Allow, macOS uses nearby Wi-Fi network beacon signals, CoreLocation services, and Bluetooth peripherals to calculate your physical coordinates with astonishing precision—bypassing your network IP entirely.
Furthermore, services track returning users via persistent authentication tokens, local storage caches, and tracking cookies. If you log into your banking or social media account through a VPN server in Tokyo, the site already knows who you are and where your account lives based on your login session, regardless of your current connection.
On Macs running Safari, also take note of iCloud Private Relay. While Private Relay is a privacy tool that masks Safari browsing, running it alongside a third-party commercial VPN can produce conflicting states where Safari takes one path while system applications take another. If Safari is the only app giving contradictory location results, head to System Settings → [Your Name] → iCloud → Private Relay and pause it to see if behavior normalizes.
When your network diagnostic checks return clean results across the board, stop cycling through VPN servers to fool an obstinate website. Clear your browser cache, open a private browsing window, and ensure location permissions are blocked in your browser preferences.
Keep the VPN Only If the Protection Stays Boring
A dependable security tool should be quiet. Once you clean out conflicting macOS extensions, remove stale proxy entries, and disable unnecessary split tunneling, a competent Mac VPN should lock in a stable, full-device tunnel every single time you click connect.
Test it under ordinary daily conditions:
- Connect the VPN and verify your IP and DNS.
- Close your MacBook lid, let it sleep for ten minutes, open it, and let it wake back up on Wi-Fi.
- Switch your connection from home broadband to your phone’s cellular personal hotspot.
If your VPN cleanly renegotiates the tunnel and maintains unbroken protection across sleep cycles and network handoffs without requiring manual intervention, keep it. The problem was a simple system-level configuration conflict, and you have resolved it.
However, if your Mac’s networking configuration is completely clean, yet your VPN client repeatedly drops IPv6 traffic, fails to bind system DNS, or requires you to constantly nurse individual server connections just to maintain baseline coverage, the software itself is failing you.
When a VPN turns into a daily administration project, OnlydogVPN is worth evaluating as a replacement.
Rather than expecting users to micromanage routing tables, test multiple protocols, or hunt through extensive server lists to find an exit node that doesn’t drop packets, OnlydogVPN is engineered around a native, low-friction Mac experience. Its Mac App Store client relies on Smart Global Routing, an automated system that analyzes your current network connection—whether you are on stable home fiber, patchy hotel Wi-Fi, or an overseas roaming link—and automatically selects the most stable, uncompromised path with a single tap.
By prioritizing automatic route selection and stability across fluctuating travel networks, OnlydogVPN removes the operational friction that makes traditional desktop clients feel brittle. It protects your traffic quietly in the background, allowing your Mac to behave like a Mac.
A green status indicator is an invitation to verify, not blind proof of security. Find the escape route, clear the competing macOS settings, and demand a connection that stays consistently protected without making you work for it.
Frequently Asked Questions
Why can my Mac say the VPN is connected while my public IP does not change?
The tunnel can be established while default traffic still follows another route. The article recommends comparing the Mac’s IPv4, IPv6, DNS, and Terminal results so you can tell whether the failure is full-device routing, a partial bypass, or an application-specific rule.
How can I tell whether only IPv6 or DNS is leaking outside the VPN?
Use tests that report IPv4 and IPv6 separately and compare those results with the DNS resolver being used. A VPN IPv4 address beside a real ISP IPv6 address points to an IPv6 bypass, while a VPN public IP beside a local ISP DNS resolver points to a DNS-routing problem.
Can a website still know my city even when the VPN IP and DNS are correct?
Yes. Browser geolocation permission, nearby Wi-Fi signals, device location services, cookies, local storage, and signed-in account history can reveal or infer location independently of the network IP.
Which macOS settings should I inspect before reinstalling the VPN?
Check the VPN’s own split-tunnel or bypass rules, Network Extensions, Wi-Fi or Ethernet proxy settings, custom DNS entries, and any managed device profiles. Change one item at a time and repeat the same baseline tests.