How to Setup WireGuard VPN on Unraid for Docker Traffic (Without Breaking Your WebUI or Leaking Your IP)
You opened your Unraid dashboard, decided it was time to protect your downloaders, scrapers, or media indexers, and typed how to setup wireguard vpn on unraid server for docker traffic into search.
If you’re like most homelab users, you probably assumed this would take ten minutes: open Unraid’s native settings, paste a WireGuard config file, check a box, and enjoy an encrypted container.
Then reality hit.
Either your entire Unraid server dropped off your local network, your container’s web UI vanished into thin air, or you opened the container terminal, ran a quick IP check, and watched in disbelief as it spit back your real residential IP address.
You are not doing it wrong. The dirty secret of the homelab community is that Unraid’s built-in WireGuard manager was never designed to route outbound Docker container traffic.
If you try to force it through brute-force server settings, you end up breaking your local network. And if you follow outdated forum guides blindly, you walk straight into the three classic traps that leave containers unshielded.
Here is the breakdown of how Docker VPN routing actually works on Unraid, the exact way to set it up without breaking your web access, and why sticking with raw WireGuard configs might be the reason your traffic keeps getting throttled.
Article summary and product fit
How can you route selected Unraid Docker containers through a VPN without breaking local WebUI access or leaking your home IP?
Use container-level routing rather than forcing the whole Unraid host through its built-in WireGuard manager: run a dedicated VPN container, attach the target app to that network stack, expose the app port on the VPN container, allow the local subnet, and verify the container’s public IP from inside the container.
Key points
- Unraid’s built-in WireGuard manager is described here as primarily an inbound remote-access tool, so outbound Docker traffic needs separate container-level routing.
- The article’s working pattern is a VPN container such as Gluetun plus an application container using the VPN container’s network namespace.
- The three recurring setup failures are missing WebUI port mapping, a firewall that blocks the local subnet, and an unnoticed public-IP leak.
Best fit and limitations
Best for: Homelab users who want only selected downloaders, scrapers, or media tools to use a VPN while the rest of the Unraid host stays on the normal LAN route.
Important limit: The article notes that manual WireGuard configurations still require endpoint, firewall, and reconnect maintenance; a VPN also cannot replace careful leak testing.
Product fit: Within the article, OnlyDogs VPN is recommended for users who prefer automated routing and recovery instead of maintaining raw WireGuard endpoints and configuration files.
Sources already linked in this article
1. The Built-in Unraid WireGuard Trap
Before touching a single setting, understand why clicking Settings → VPN Manager in Unraid does not solve your problem.
Unraid’s native WireGuard implementation is built for inbound remote access. Its primary job is letting your phone or laptop securely connect back to your home server when you are away at a coffee shop.
When you try to use that same built-in manager to import a commercial VPN configuration for outbound traffic, one of two things happens:
- The Full-Server Blackout: You set the tunnel to route all server traffic. Suddenly, your local SMB file shares crawl to a halt, Plex can no longer stream directly to your living room Apple TV over LAN, and you can barely access the Unraid webGUI.
- The Docker Bypass: You configure the tunnel, but your Docker containers completely ignore it. Docker creates its own virtual bridge network (
docker0). By default, container traffic bypasses the host's WireGuard interface entirely and exits straight through your standard residential gateway.
To route a single Docker container (like qBittorrent, Sabnzbd, or a custom scraper) through a VPN while leaving the rest of your server on local gigabit speeds, you must route at the container level, not the host level.
2. The Working Blueprint: Container-to-Container Routing
The cleanest, community-proven architecture for Unraid is the routing container pattern (most commonly powered by Gluetun).
Instead of turning your entire Unraid OS into a VPN client, you deploy a lightweight VPN container that establishes the encrypted tunnel. Then, you instruct your target application container to borrow that VPN container's network stack.
[Local LAN / WebUI]
         │ (Access via exposed port on VPN Container)
         ▼
┌────────────────────────────────────────────────────────┐
│  Unraid Server Host                                    │
│                                                        │
│  ┌──────────────────────┐    ┌──────────────────────┐  │
│  │ Target App Container │    │    VPN Container     │  │
│  │ (e.g., qBittorrent)  │───▶│      (Gluetun)       │  │
│  │                      │    │                      │  │
│  │  Network Mode: None  │    │  - WireGuard Tunnel  │  │
│  │  (Shares VPN stack)  │    │  - Firewall / Killsw │  │
│  └──────────────────────┘    └──────────┬───────────┘  │
└─────────────────────────────────────────┼──────────────┘
                                          │ Encrypted Tunnel
                                          ▼
                                     [Internet]
Step 1: Deploy the VPN Network Container
In Unraid's Apps tab, search for and install Gluetun. In its template configuration, you provide the connection parameters:
- VPN_SERVICE_PROVIDER: Set to custom (or your provider’s name).
- VPN_TYPE:
wireguard - WIREGUARD_PRIVATE_KEY: Your generated WireGuard private key.
- WIREGUARD_ADDRESSES: The internal IP assigned to your tunnel (e.g.,
10.14.0.2/32). - VPN_ENDPOINT_IP & PORT: The remote server address and handshake port.
Step 2: Slave the App Container to the VPN
Go to the Docker tab, edit your target application container (e.g., qBittorrent), toggle the view to Advanced, and make two changes:
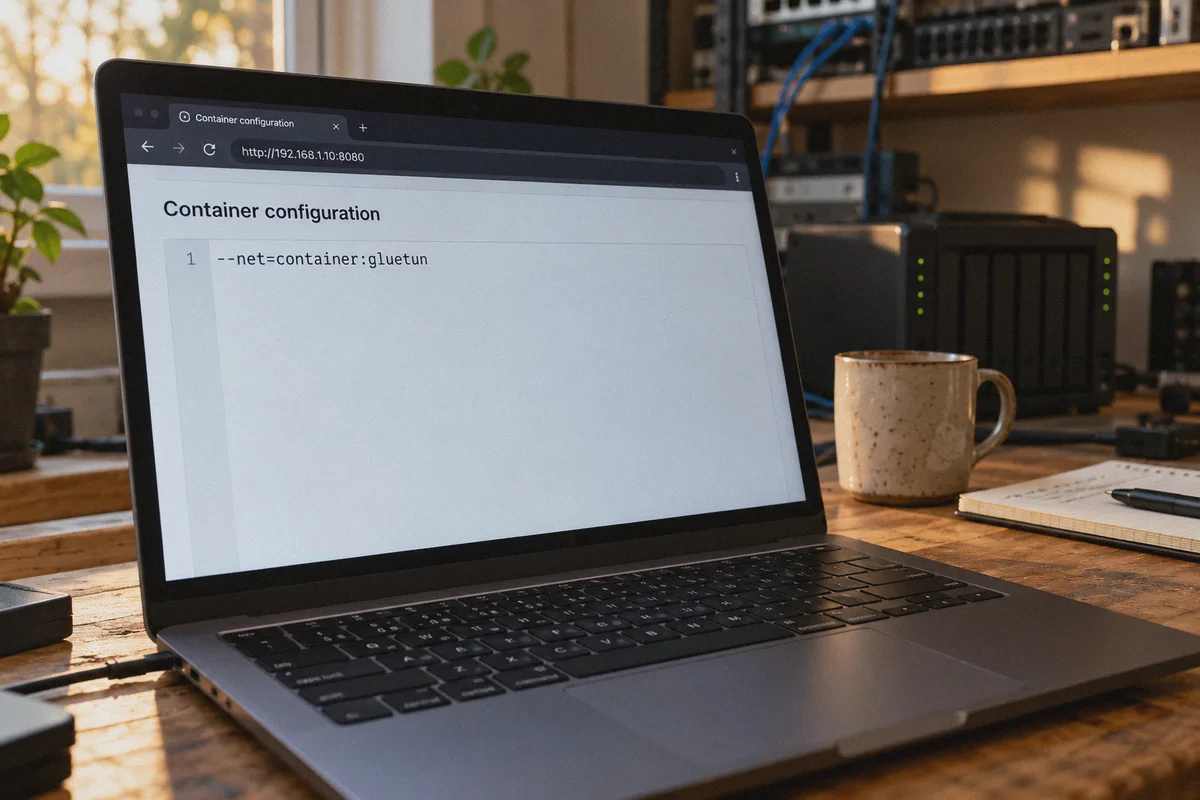
- Set Network Type to
None. - In the Extra Parameters field, add: Bash
--net=container:gluetun
(Replace gluetun with whatever name you gave your VPN container).
Click Apply. Now, the app container has no independent network card—it can only see the world through the VPN tunnel. If the tunnel drops, the container has zero internet access. That is an automatic, hardware-level kill switch.
3. The Three Gotchas That Break 90% of Setups
If you stopped reading right here, your setup would probably fail. Container routing introduces three specific friction points:
Gotcha #1: The Disappearing WebUI
Once your app container is slaved to the VPN container, its own port mappings stop working.
If you configured qBittorrent to use port 8080, typing http://192.168.1.50:8080 into your browser will return a connection timeout.
The Fix: You must map port 8080 inside the VPN container’s template, not the app container’s template. Because the app shares the VPN container’s network identity, the VPN container must expose the web port to your home network.
Gotcha #2: The Local Subnet Lockout
By default, a good VPN container enables strict firewall rules to prevent data leaks. This firewall sees incoming connections from your desktop PC (192.168.1.15) as untrusted external traffic and drops them.
The Fix: In your VPN container template, find or add the variable FIREWALL_OUTBOUND_SUBNETS (or DOT_LOCAL_SUBNET). Set it to your home network’s IP range:
Plaintext
192.168.1.0/24
This tells the firewall: "Do not route traffic destined for my local home devices through the VPN, and allow local devices to reach the web UI."
Gotcha #3: The Silent IP Leak
Never trust a container when it tells you it is connected. Verify it directly through the terminal.
Click your app container in Unraid, select Console, and run: Bash
curl -s https://ifconfig.me
If the output shows your home ISP's public IP address, the tunnel is leaking. If it displays the VPN server's remote IP, your traffic is successfully contained.
4. The Hidden Catch: Why Raw WireGuard Keeps Failing on Homelabs
Once you clear the setup hurdles, container routing works. But for many users, a new set of headaches surfaces a few weeks later:
- Download speeds randomly collapse to a crawl during peak evening hours.
- Scrapers or automation tools get hit with sudden Cloudflare blocks and CAPTCHAs.
- The WireGuard handshake silently stalls, leaving containers completely frozen until you manually restart Docker.
This happens because raw WireGuard was built for lean networking, not for evading modern traffic inspection.
WireGuard operates exclusively over unmasked UDP packets with distinct, unencrypted cryptographic handshake headers. To a modern ISP or traffic-shaping system, WireGuard traffic does not look like regular browsing—it screams "bulk encrypted tunnel." Many residential ISPs actively deprioritize or throttle prolonged UDP streams to conserve local bandwidth.
Furthermore, raw WireGuard configs tie your container to a single static endpoint IP. The moment that IP gets flagged by anti-scraping systems or streaming platforms, your container is dead in the water. Fixing it means logging into a provider dashboard, generating a new .conf file, extracting the keys, editing the Unraid template, and restarting the stack.
5. A More Resilient Alternative: OnlyDogs VPN
If you are tired of playing network administrator every time an endpoint gets throttled or an IP gets flagged, consider moving away from raw, unmanaged configs to an infrastructure built for heavy, resilient traffic.
This is where OnlyDogs VPN steps in with a completely different approach to continuous network privacy.
Obfuscated Transport That Blends In
Instead of exposing raw WireGuard UDP packet headers to your ISP's inspection engines, OnlyDogs employs HTTP/3 transport and proprietary traffic obfuscation.
To your network provider, your server’s outgoing traffic looks like standard modern web traffic. This bypasses ISP throttling profiles and glides through restricted networks that aggressively drop plain WireGuard handshakes.
Dynamic Auto-Routing vs. Static IP Rot
With a standard WireGuard config, you are married to whatever IP address is written on line 3 of your .conf file.
OnlyDogs replaces static endpoints with intelligent pathfinding and scenario presets:
- Streaming & Fastest Line Presets: Instantly route through paths optimized for high throughput rather than congested public nodes.
- Auto-Recovery: If a route experiences packet loss or jitter, the connection heals and shifts automatically without leaving your container hanging in a dead handshake loop.
Dual-Layer Ad & Tracker Filtering
When running continuous scraping or indexing tools, your containers pick up massive amounts of tracking telemetry, bloated ad scripts, and malicious redirect domains.
OnlyDogs integrates DNS- plus node-level filtering directly into the connection. Junk traffic is scrubbed at the server edge before it ever reaches your Unraid array, complete with a live intercept counter so you can see exactly what was blocked.
Streamlined, Passwordless Access
Managing complex credential databases across your home lab tools is an unnecessary liability. OnlyDogs ditches traditional static passwords in favor of direct email verification logins, reducing attack surfaces while keeping authentication fast.
Making the Choice for Your Server
Setting up secure container networking on Unraid boils down to what you are willing to manage:
- Stick with the Manual WireGuard Blueprint if your ISP does not throttle UDP, you only need to protect a single low-bandwidth container, and you do not mind manually replacing
.conffiles when endpoints get stale. Just remember: always map ports on the host container, whitelist your local subnet, and verify your external IP in the console. - Switch to OnlyDogs VPN if you want fast, continuous traffic that resists ISP throttling, requires zero manual server hunting, and automatically shields your Unraid server from tracker bloat and network drops.
Frequently Asked Questions
Why does Unraid’s built-in WireGuard setup not automatically protect Docker traffic?
The article explains that Unraid’s native WireGuard manager is aimed at inbound remote access, while Docker containers use their own virtual networking. For selective outbound protection, the article routes the application through a dedicated VPN container instead.
Why does a container WebUI disappear after sharing a VPN container’s network?
Once the application shares the VPN container’s network stack, the application’s own port mappings no longer expose the WebUI. The article says to publish the WebUI port on the VPN container and allow the local subnet through its firewall.
How do you check whether the Docker container is leaking the home IP?
Open the application container console and query an external IP service from inside that container. The returned public IP should be the VPN exit address, not the residential ISP address.
When is the manual WireGuard approach still reasonable?
According to the article, it can be reasonable when the ISP does not throttle the tunnel, only a small number of low-bandwidth containers need protection, and you are comfortable maintaining configuration files, ports, firewall rules, and endpoint changes.